"You dont have to be great to start,
but you have to start to be great."
~ Zig Ziglar
After a lengthy hiatus to relocate and get my head back on straight I am happy to announce the resumption of my promised adventures!
Bus conversion Part 1:
First of all, isnt she pretty?


Ok ok, shes a bus. I get it. But the potential!!
Step 1: painting prep. Gotta take off all the OH GOOD LORD DID YOU KNOW JUST HOW MUCH STICKERS AND REFLECTIVE TAPE GOES ON A SCHOOL BUS? Damn this stuff is sticky. Friendly neighbor suggested using WD-40 to remove adhesive...it helped...some...

So...

Many...

Stickers...

Everywhere!!!

Three months later most of the stickers are finally off and we start sanding. My best friend and godson are helping me for my birthday.

Then my goddaughter came home from school and joined in.

The most urgent step upon arriving in Florida was covering the windows. (Most of them were broken by a druggie in Brooklyn before I left.) I removed the old frames and then cut out 1/2 inch wood panels to fill the holes. I gave one face and all the edges a few thick coats of red Rustoleum outdoor paint, bolted in the new windows, and sealed the edges with allpurpose waterproof calk.
Progress was very slow and sporadic at this point but I finally used acetone on the stubborn (near impossible) SCHOOL stickers and then after realizing how absurdly huge of a task hand sanding the ENTIRE bus would be with my besties little palm sander and my two sanding blocks I decided to try out some chemical sanding stuff. Should have done that MUCH sooner. After covering the bus (and subsequently myself) with harsh chemicals, I gave her a good scrub with a vinegar/bleach/water mix that was recommended for a pre-paint deep clean and got to the fun part!
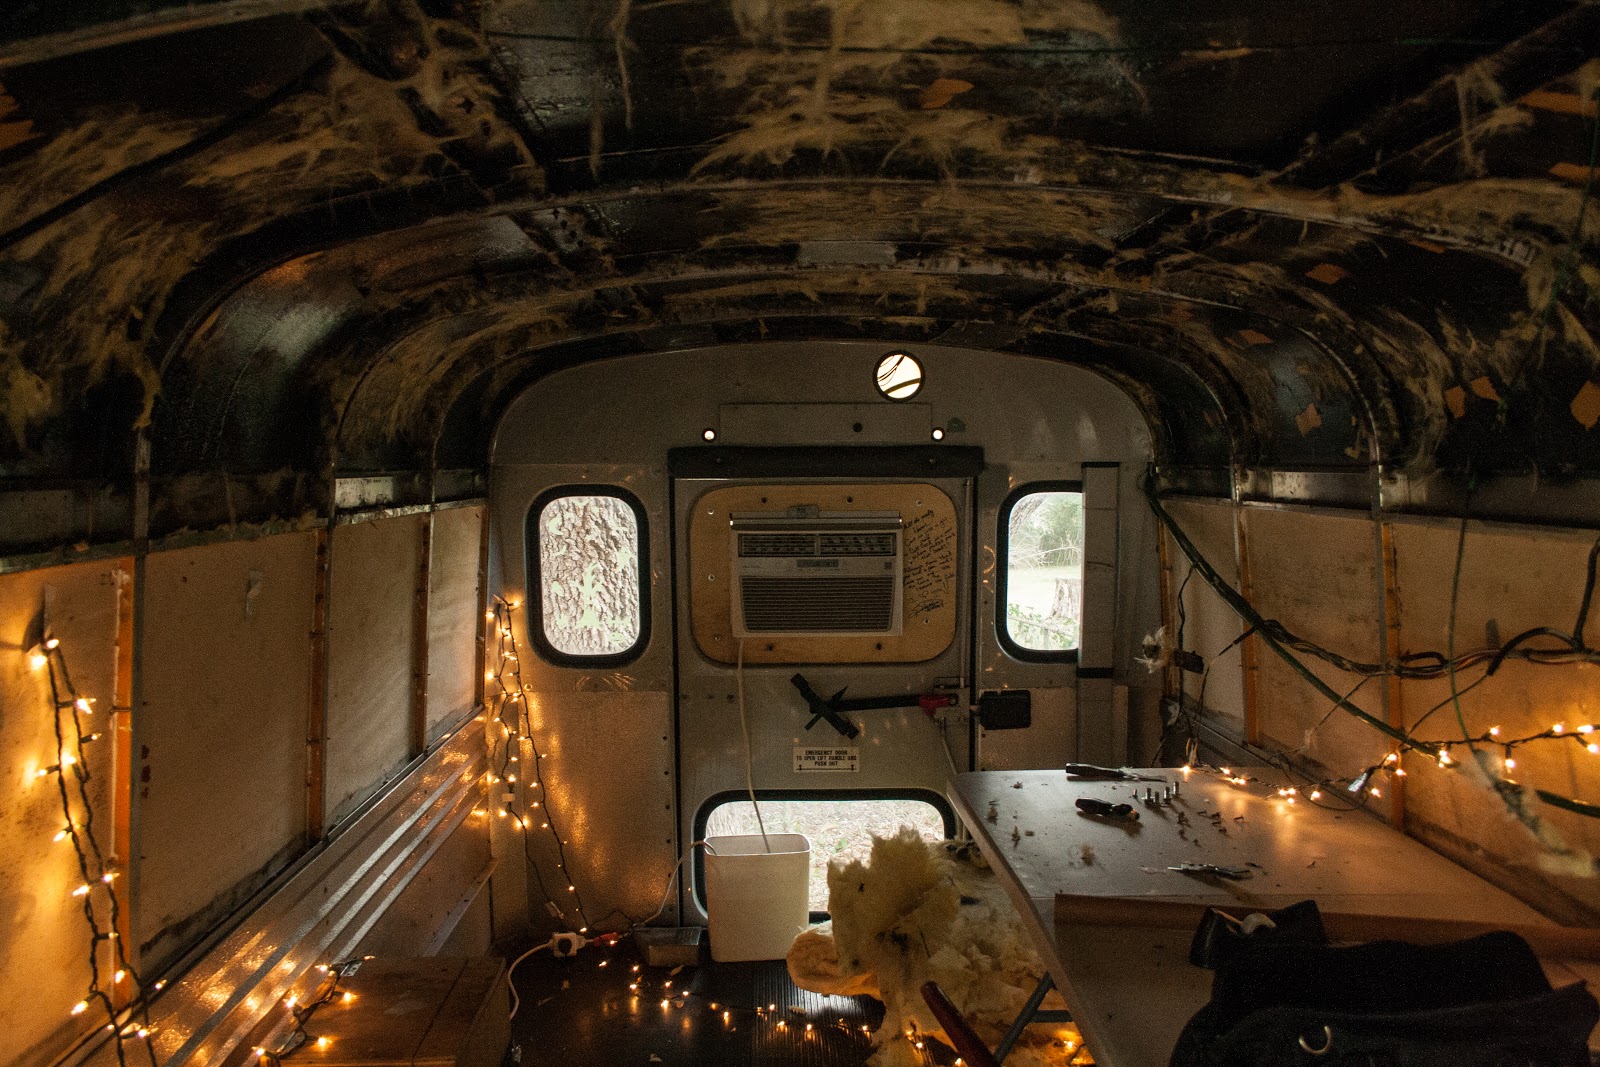
I had to stop working on the first coat (as you can see) due to florida winter weather patterns, so I move inside the bus. I spent a fair amount of time waiting to start the inside demo due to my complete lack of knowledge of wiring and my fear of screwing something up. I finally got over that and just ripped it all out (the back end stuff that is) as well as the ceiling panels and old insulation.
Pretty new color and pile of gak!

Yea, still working on this side...

Interior after ceiling panels and insulation removed. See the wires all hanging down on the right?
They all led to this electrical panel...

All the crazy wires...

Yea, I tore that crap out.

And that's when I started to understand how it all went together...and just how much I still had to take apart...
To Be Continued...