"If you put down a good, solid foundation and build one room after another, pretty soon you have a house."
~Rod Dixon
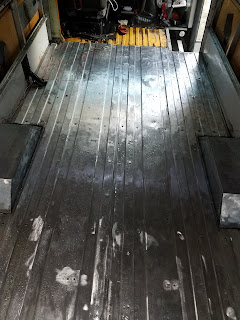
The sub floor. The floor of the bus consisted of a rubber mat glued to a thick wooden floor, screwed in turn to the metal sub floor. The wood was in good shape and I was minded to leave it be but after doing some research I decided otherwise. There were very clear warnings about doing so. I figured it would be much better if be safe and so I stripped her down to the sub floor. I didn't have the big rust holes and issues that the warnings mentioned but there was the potential to be so I got to work.
Here she is all naked and gross...
Many of the old bolt shafts that once held the seats still stuck through the floor and needed to be removed. There were also all the screw holes from those securing the old wood floor the sub floor. Once I succeeded in removing any errant screws and bolts, the floor had to be properly cleaned to prepare for the hole patches and a coat of primer.
The cleaning was a grueling process that consisted of grinding clean the metal surface with a rough wheel attachment and a corded drill.
before half way done
It was intensely satisfying though. The difference was extreme and I finally felt like I was starting to make progress on the interior of the bus. Even though I was exhausted and disgusting, it took me forever to go back inside and get cleaned up. I couldn't stop looking at it, and I was eager to get back to it!
The grinding continues...
I had picked up some fresh wheels and the work was flying!
All done and sooooo preeeeettty!!!!!
The holes were filled with Bondo on a patch of window screen material, and then the whole floor liberally coated with a primer of Rustoleum.
Next a thin layer of vehicle insulation...
Looks so cozy like this!
And finally, the new wood floor.
With a brand new layer of treated 3/4" ply I was finally at the building stage. I had purchased only two pieces knowing I'd need more but not how much. Turns out one more would do it, but that piece can wait. Now I turned my attention to framing out the bed. The holidays loomed and visiting family would need places to sleep. Moving back out to the bus, at least at night, was about to become a necessity...


